To add a Facebook Login button to your project, follow these steps.
- Enable the "Facebook" provider in the
Sign Insettings page (Settings > Sign In), and copy the Redirect URI. - Go to the Facebook developers portal and create a new app. Choose Consumer as a type.
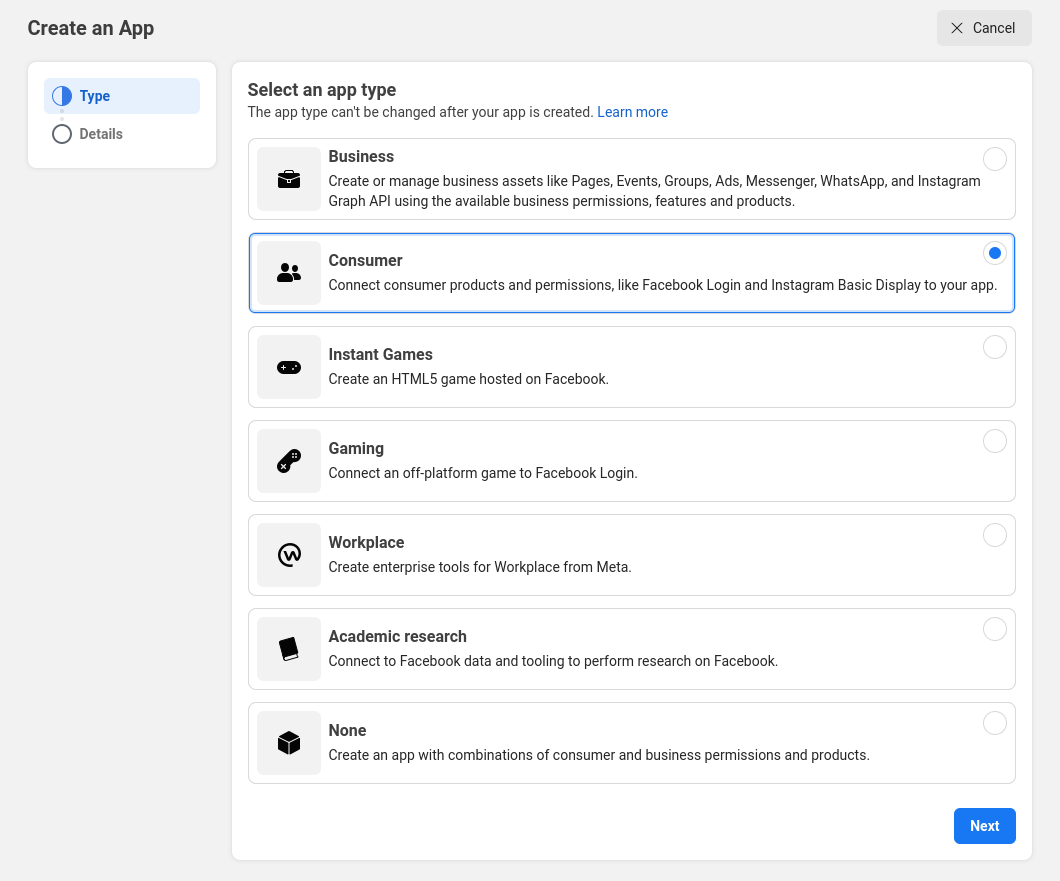
- In Details, enter the application name and email address, and click the Create app button.
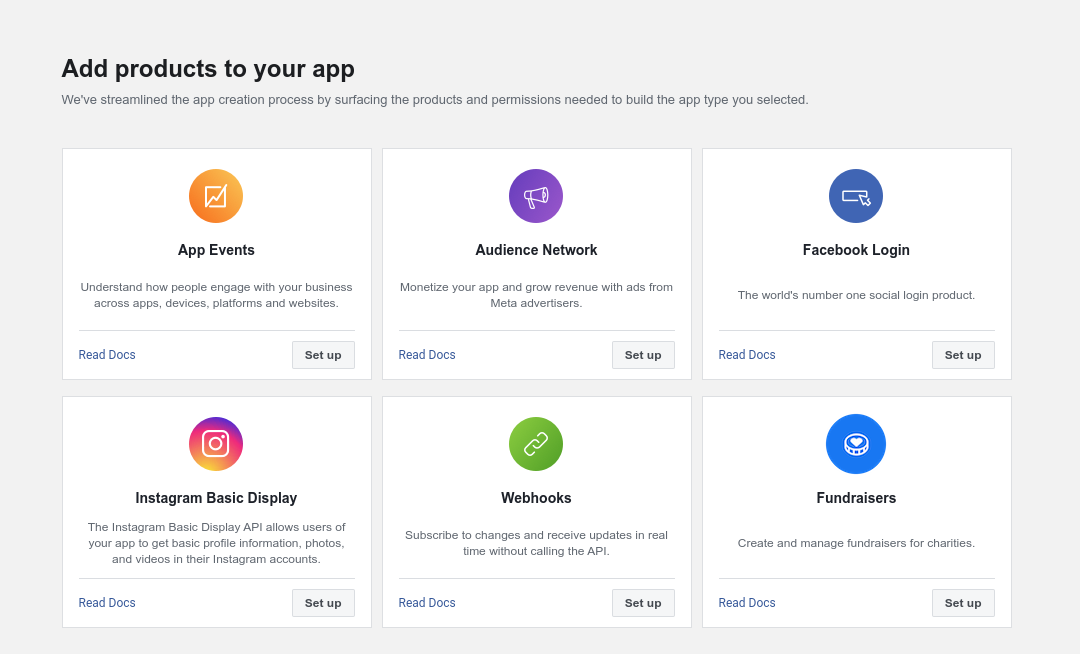
- In the Application Dashboard, choose to set up Facebook Login.
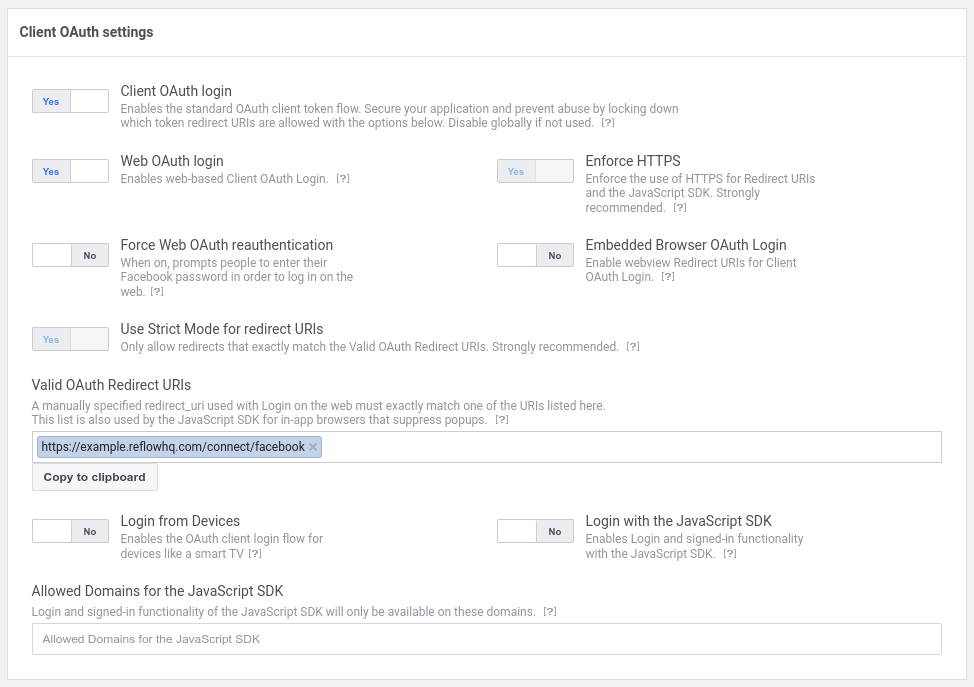
- In the sidebar on the left, choose the Facebook Login Settings screen.

- In the Client OAuth settings form, paste the URL you copied in step 1 into the Valid OAuth Redirect URIs field.
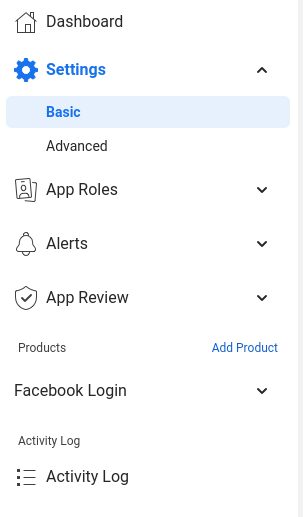
- From the sidebar, navigate to the Basic settings screen.
- Here, enter your app's privacy policy, terms of service and data deletion URLs. You can also choose an icon 1024 by 1024px in size. This information will be displayed to users in the sign in dialog.
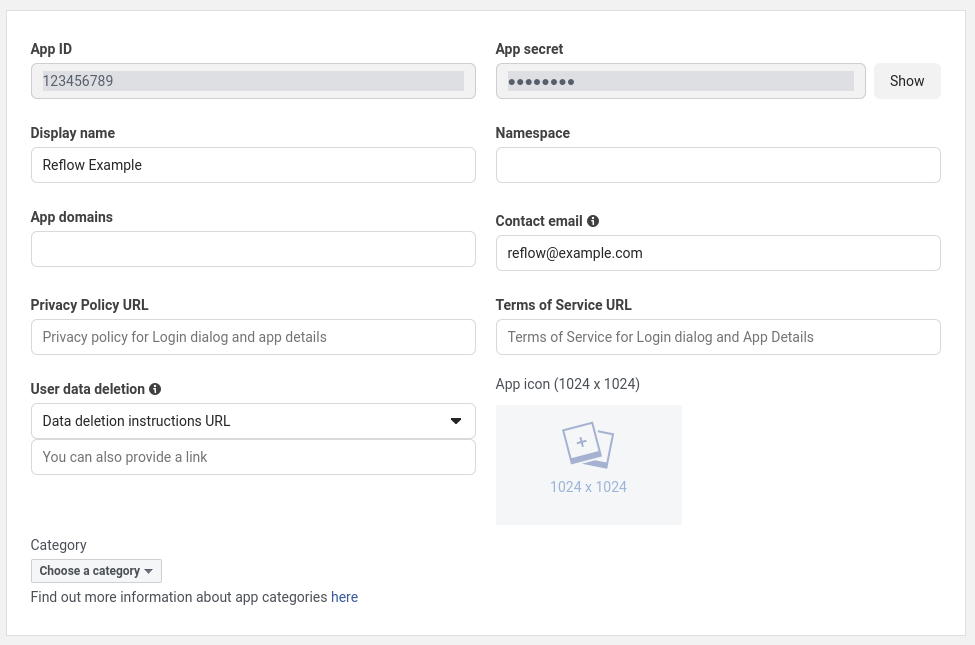
- Save these settings. Then copy the App ID and App secret to Reflow.
- In the toolbar at the top, switch App Mode from Development to Live.

- From the Sidebar, navigate to the Permissions and Features screen.
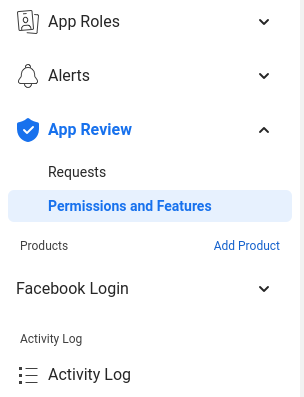
- Here you need to find the public_profile and email permissions and click the Get advanced access button so that you can request this information from user accounts when they sign in. Don't select additional permissions, otherwise you will need to go through App Review. (Note: open the image in a new tab to see it full size).

With this, users of your app will be able to login with their Facebook accounts in your project.
Note
Facebook gives users the option to switch off email sharing when signing in. As a result some users in your Registrations tab will have no associated email address.